
Introduction
What is Purple Teaming? For me, it simply means emulating attacker techniques and testing both your detection and response capabilities. Let’s say you are interested in T1136 and you want to confirm that your defenses are able to detect Account Creation. From a Purple Teaming prospective that means you should attempt to create local account(s) and check if your controls are able to detect (and respond) to this event.
In this post, we’ll speak about Atomic Red Team tool and how you can use to easily emulate adversary techniques. It uses a building block called Atmoic, which simply mean a test to run. As of the day of writing this post, there are more than 700 tests pre-built in the tool. And all of them are mapped to MITRE ATT&CK model for better tracking. There are different ways to install and use the tool, but we’ll focus on PowerShell because let’s admit it, PS rocks🙌.
Before We Start
- Make sure you have permission to run the test 📓.
- Make sure you understand any test before you run it.
- Run the tool only on test machines/environments.
- If your test machine is running on a production network, I wouldn’t really call it a test machine 😉.
Getting Started
Prerequisites
- Authorization 🎩.
- PowerShell with admin access, you also need to allow executing scripts in PS
Set-ExecutionPolicycommand. - Internet connectivity to https://githubusercontent.com over HTTPS to Atomic-Red-Team and Atomics download.
Installation
There are two ways to install Atomic-Red-Team, with (or without Atomics). Installing it with Atomics is the recommended approach and it can be achieved with the following command:
IEX (IWR 'https://raw.githubusercontent.com/redcanaryco/invoke-atomicredteam/master/install-atomicredteam.ps1' -UseBasicParsing);
Install-AtomicRedTeam -getAtomics
 If installation has failed due to any reason and you wish to restart, you can use the
 Force switch as shown below
IEX (IWR 'https://raw.githubusercontent.com/redcanaryco/invoke-atomicredteam/master/install-atomicredteam.ps1' -UseBasicParsing);
Install-AtomicRedTeam -getAtomics -Force
Importing the PS Module
If you close your PowerShell window, you likely need to re-import the module; which can be done with the following command
Import-Module "C:\AtomicRedTeam\invoke-atomicredteam\Invoke-AtomicRedTeam.psd1" -Force
Feature Overview
Listing All Supported Techniques
You can use this command to show the names of all supported techniques or attacks. Which would take a couple of minutes, but it’s necessary to find the ones you are mostly interested in.
Invoke-AtomicTest All -ShowDetailsBrief
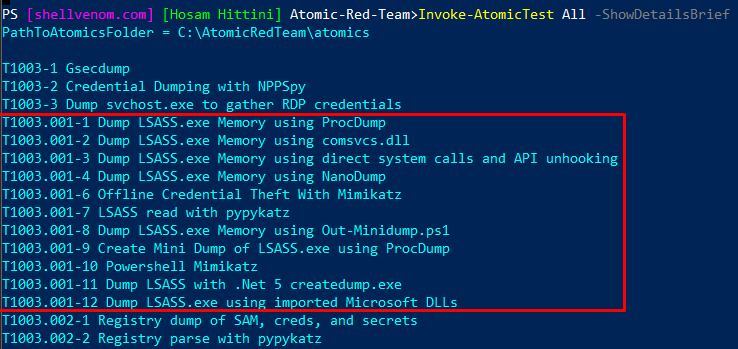 In some cases, you will find there’s more than one test for a single technique. For example, T1003.001 has 12 tests as shown above.
Showing Brief Details About a Technique
This will simply show the list of tests. We replaced All with the technique ID
Invoke-AtomicTest T1071.004 -ShowDetailsBrief

Showing Details About a Technique
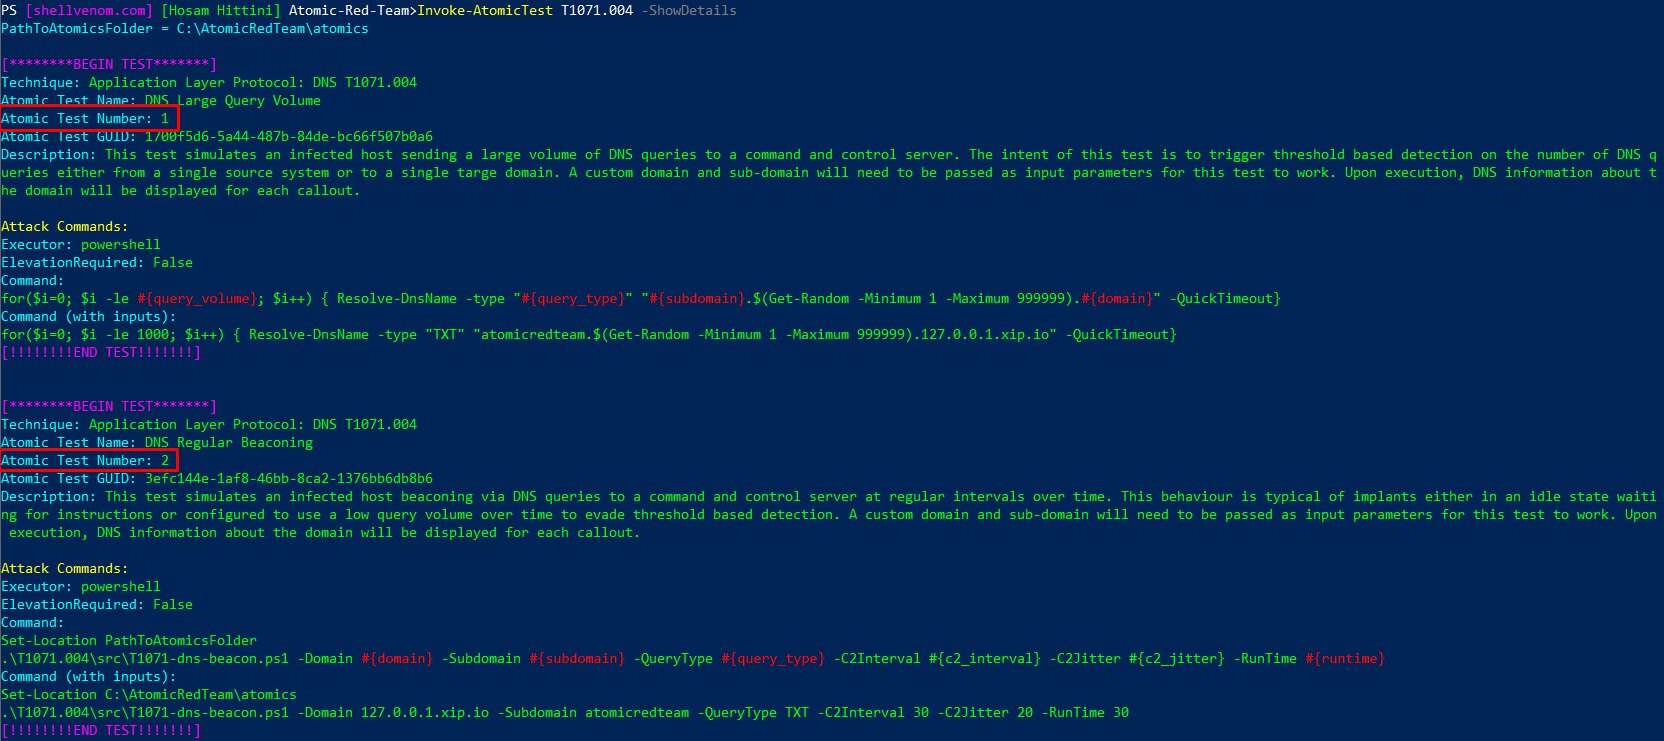
This is a very important step to understand what you are getting yourself into, it shows you the details, tools, and commands used to run the test. The command shown below will show the details of all the tests for T1071.004. Note that all tests are shown unless you specify the test number.
Invoke-AtomicTest T1071.004 -ShowDetails
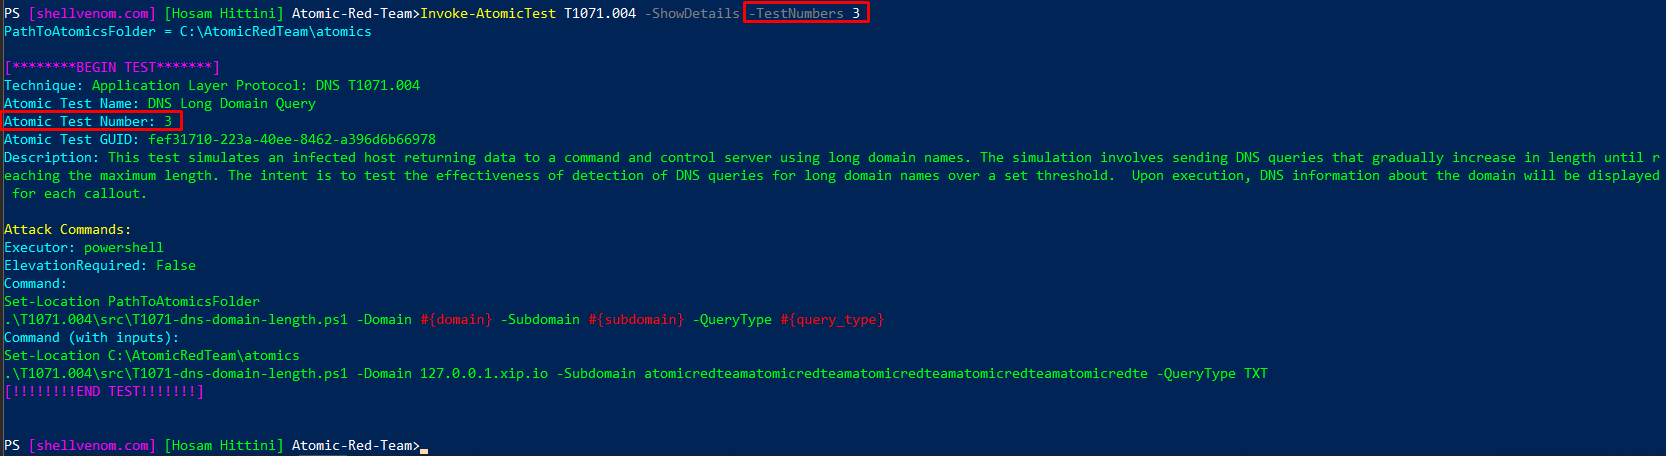
 You also have the option of focusing on a single test by appending
 TestNumber switch as shown below
Invoke-AtomicTest T1071.004 -ShowDetails -TestNumbers 3
Checking Prerequisites of a Test
Some test rely on tools that are not natively installed on Windows and they are refereed to as prerequisites. This is as simple as anything can be. Below example shows that Test 3 of T1071.004 has all the prerequisites met.
Invoke-AtomicTest T1071.004 -TestNumbers 3 -CheckPrereqs
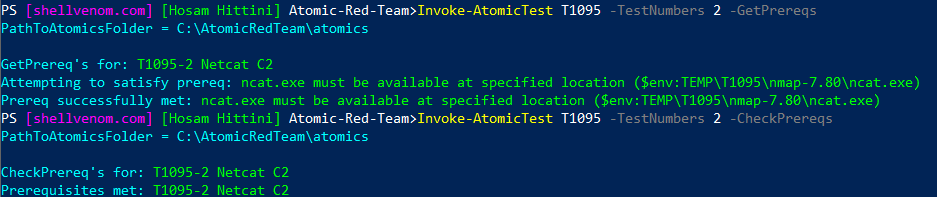
 But, T1095 test number 2 need Ncat to be installed
Invoke-AtomicTest T1095 -TestNumbers 2 -CheckPrereqs

Installing Prerequisites
Okay, what’s the easiest way to install Ncat for T1095 test number 2? A single command shown below, we replace CheckPrereqs with GetPrereqs. All good now
Invoke-AtomicTest T1095 -TestNumbers 2 -GetPrereqs
Running a Test
Removing the extra switches is what we need to do here. For example, if we want to generate long DNS queries and see if our defense tools are going to trigger an alert, we need to perform the following steps ⚡:
1. Read and Understand what’s Going to Happen
Invoke-AtomicTest T1071.004 -TestNumbers 3 -ShowDetails
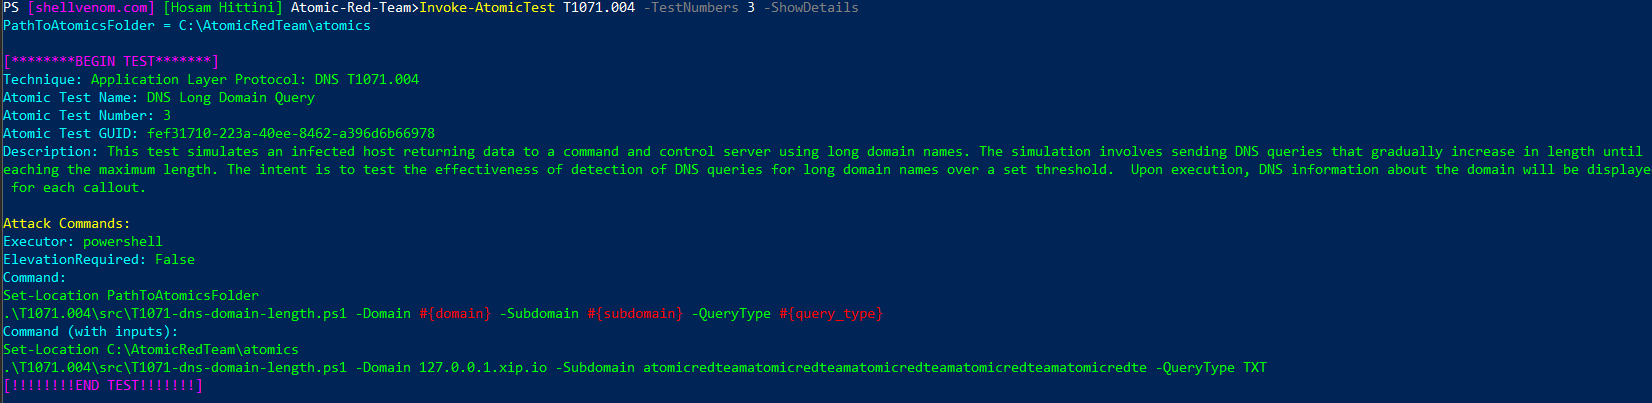 We can see it uses PowerShell, doesn’t need an elevated privilege, and we have 3 customization options shown in red.
2. Run the Test with the Default Options
Invoke-AtomicTest T1071.004 -TestNumbers 3

3. Run the Test with Custom Options (Optional)
Adding the PromptForInputArgs switch informs the tool to ask us for input arguments, which allows us to configure 3 options as shown below:
Invoke-AtomicTest T1071.004 -TestNumbers 3 -PromptForInputArgs

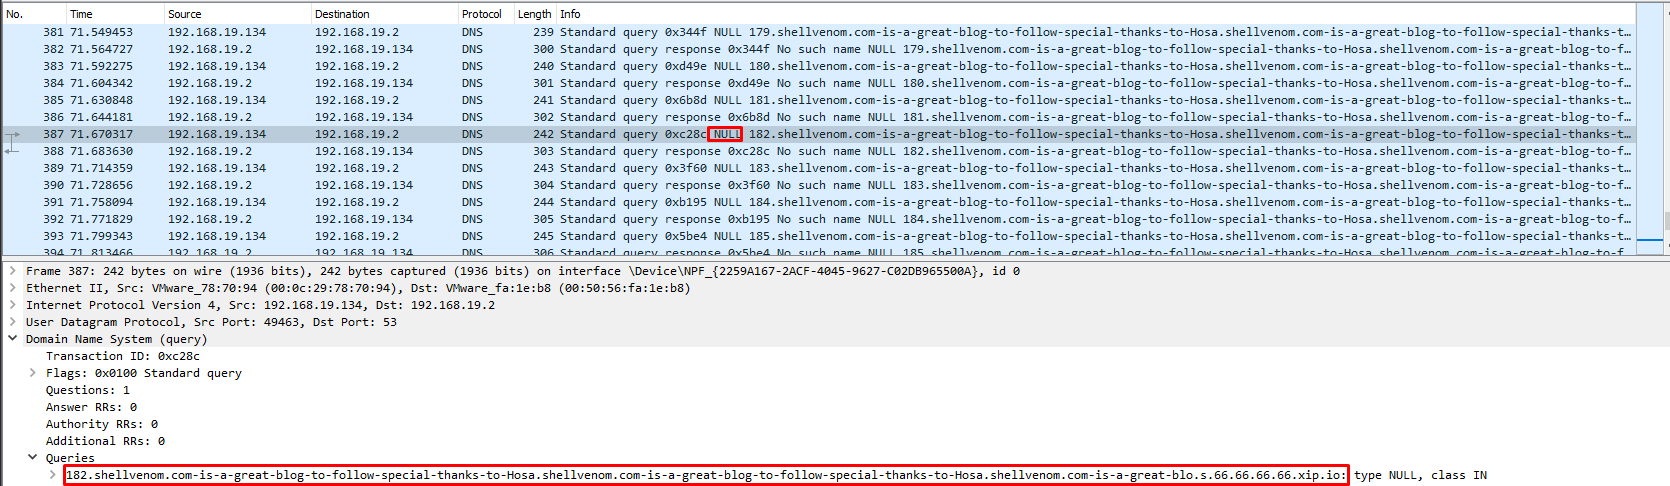
4. Verify the Test is Working!!!
Yes it does, Mr. Wireshark approves the tool 🎆
Closing Notes
I really love Atomic Red Team, it allows me to test our defenses very easily. We have went over the most important features according to Hosam Sensor. The tool is awesome, but everyone can make it better, click here if you wish to contribute ;)
Until next time 🚀
Hosam Hittini